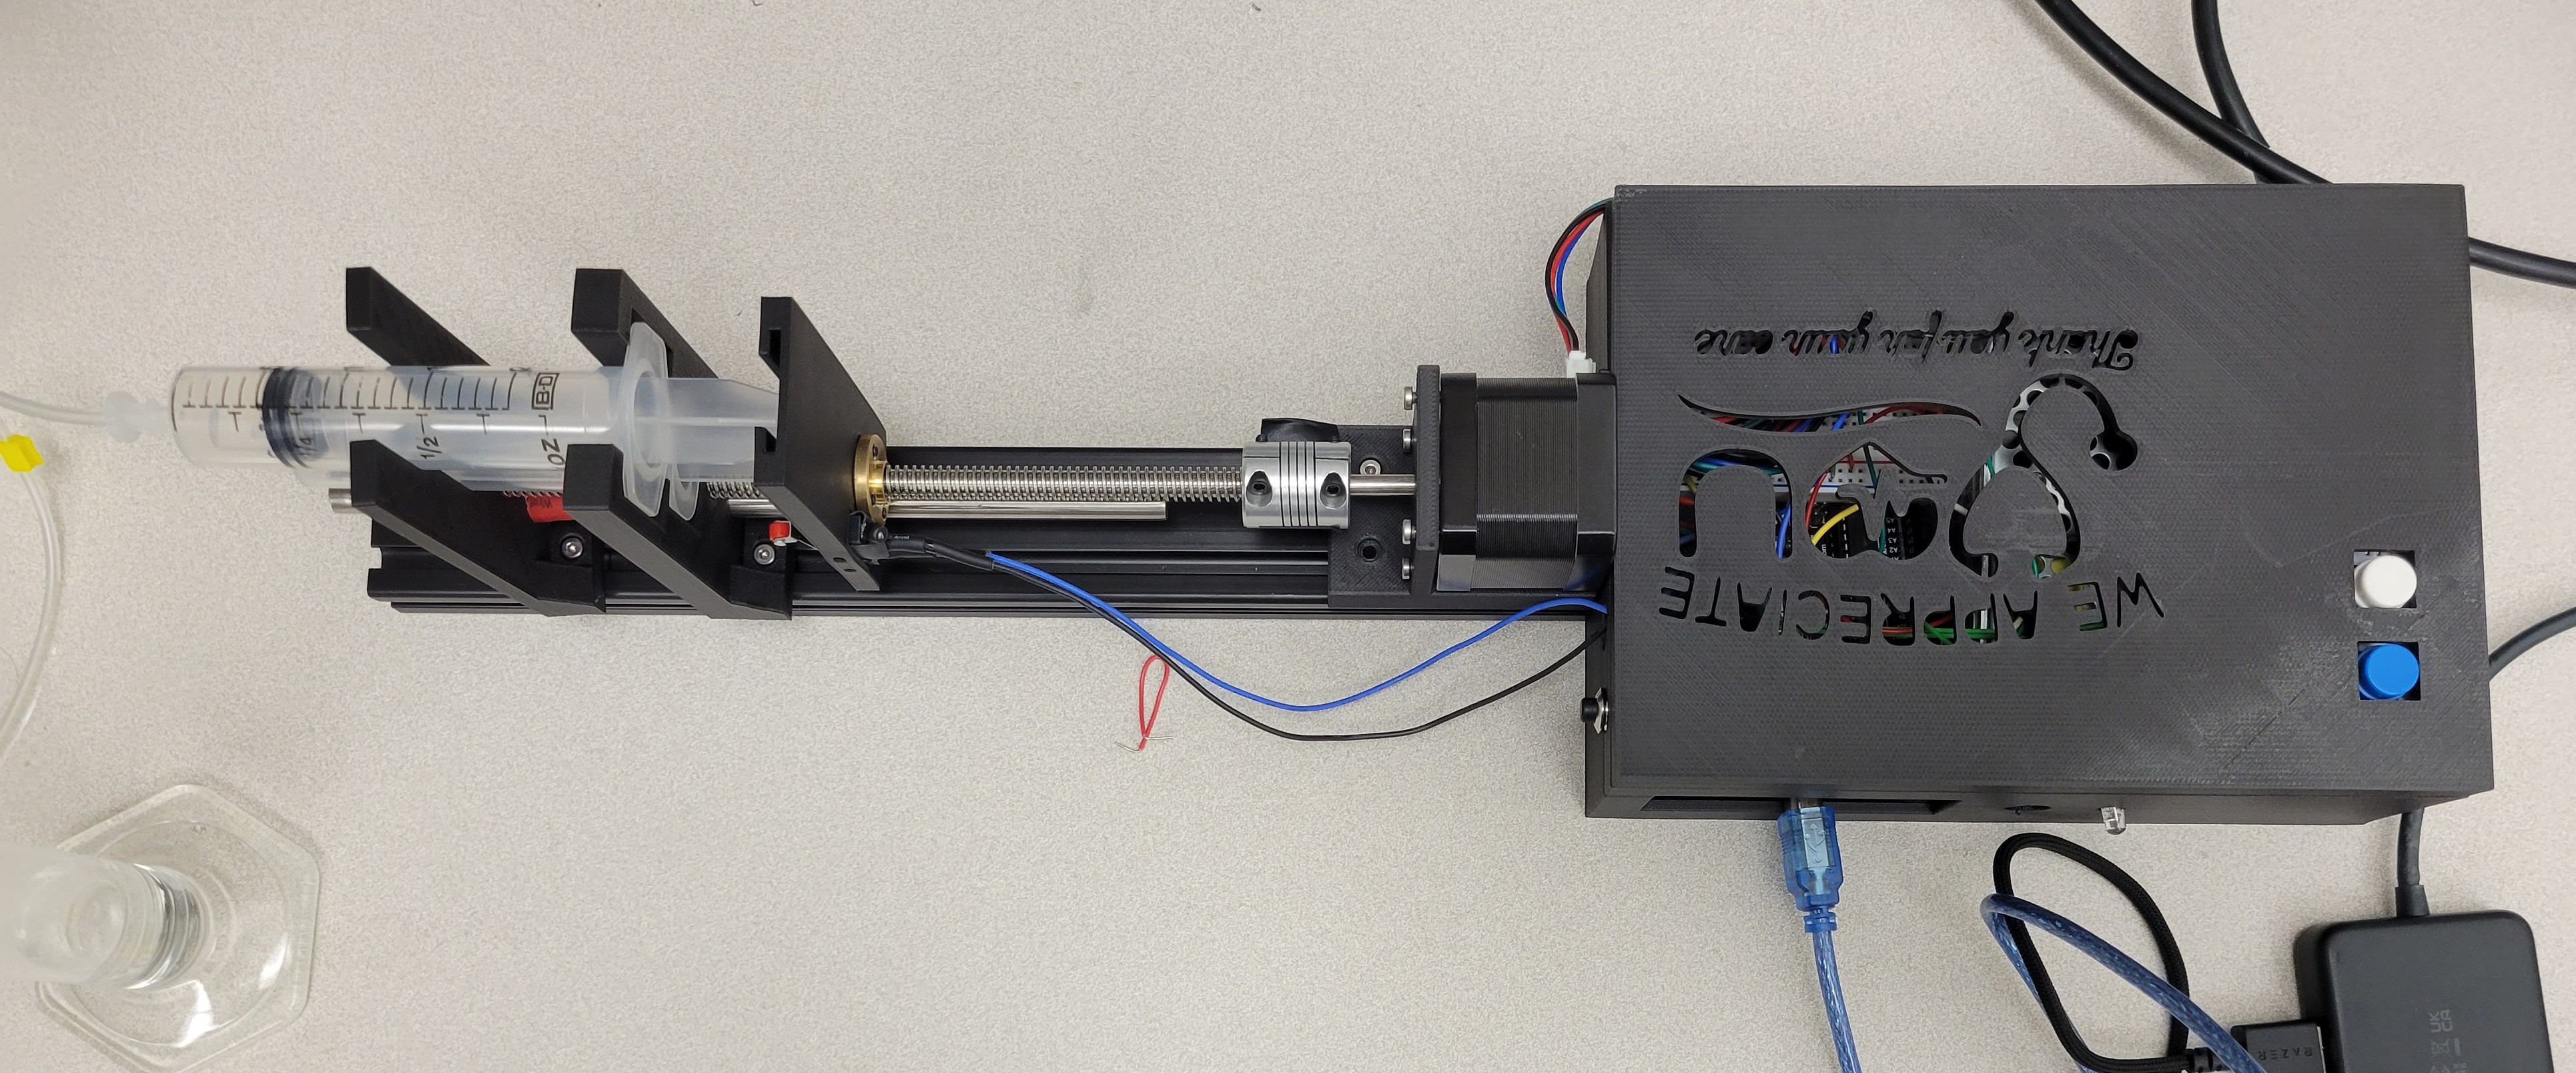
Syringe Pump
This syringe pump design and prototype was the final project for my introductory digital fabrication course. As a team, we created a CAD model of the system, wrote the Arduino code to easily control the system, and build a functional prototype.
Features
- Accurate Flow Rates The flow rate is controlled by the rotation of a lead screw initiated by a stepper motor. Our system can accurately achieve flow rates between 0.5 and 10 mL per minute.
- Minimalistic Design A key feature of this system is the minimalism associated with the 3D printed parts. Our team wanted this pump to be portable and low-profile for seamless integration into medical applications, as such thin holders move the syringe pump along the lead screw.
- Open Source Design A key feature of our design was its ability to affordably be replicated, costing less than $50 paired with detailed open source documentation our syringe pump is accessible for real-world application.
CAD Model
Components
off-the-shelf
3D printed
| Linked Part | Quantity |
|---|---|
| Motor Mount | 1 |
| Plunger Pusher | 1 |
| Syringe Holder | 1 |
| Box | 1 |
| Lid | 1 |
Arduino Code
Operating Instructions
To set the flow rate - in mL per min - adjust the variable called flow_rate to the desired flow rate in the first line of the Arduino code under the //Global variables section. Next, set the variable is_twenty to true or false depending on whether the 20 ml syringe is being used. The black button on the side of the box controls the state of the syringe pump. If the latching button is pressed, the pump pauses. If the button is unlocked the pump resumes. When running, the syringe will move at the set rate until it is out of liquid and stops. An LED on the side of the enclosure serves as a visual reference for the syringe’s operational state: green - actively running, yellow - paused, red - out of liquid. Manual adjustments, if necessary, can be made using the white button to rotate the screw clockwise or the blue button to rotate the screw counterclockwise. Note that the pump must be paused or off to activate these manual rotation buttons.